Analogies
Welcome to the second tutorial on mastering Vecto, your vector database tool!
In this tutorial, we'll extend our exploration of the Python SDK to include the Vecto class. Using the core Vecto class provides you with greater control and additional functionalities.
In our first tutorial, we walked you through the VectorSpace class, assisting you in setting up a Vector Space and creating an application capable of ingesting data and executing image and text lookups. If you're not yet comfortable with these topics, that's okay! We'll do a quick run-through in this tutorial while we set up for the main focus.
In this tutorial, we will explore the concept of analogies. Let's get to it!
Set Up Vecto Application
!pip install ftfy tqdm ipywidgets==7.7.1 vecto-sdk
Creating a Vector Space and Usage Level Token
In our previous tutorial, you successfully learned how to obtain a Vecto management token. Now, we're going to create a vector space through the portal then create a token specific to that space.
-
Launch the Vecto login page at Vecto Login. Enter your Username and Password then proceed by clicking Sign In.
-
Next, click on
Vector Spacesin the menu bar and select the New Vector Space option. For the Vector Space name, let's go withcats_dogs. Next, we get to select avectorization model. Given our intent to work with both images and text, the CLIP model is an ideal choice. Wrap it up by clicking theCreate Vector Spacebutton. To view the specifics of your Vector Space, simply click on its name in the Vector Spaces list. Remember to jot down your Vector Space ID; we'll be needing it soon. -
To interact with our vector space, we need a unique Vector Space authentication token. Start by clicking on your username to expose the Tokens tab. Set the token name as
cats_dogs_token. For our initial activities with this vector space, aUSAGEaccess token will suffice. It grants us read-write privileges for our specific Vector Space. Having selected thecats_dogsVector Space we previously crafted, proceed by clickingCreate User Token.
Remember, the token will only be displayed once, so keep it safe! We'll need it for the upcoming steps.
As always, it is important to keep your token safe. A common practice is to set the token in an .env file or export it as a variable.
Initialize Vecto and Ingesting Data
We'll begin by initializing the Vecto class and supplying it with our cats_dogs Vector Space ID and authentication token.
By default, the Vecto class checks for the existence of VECTO_API_KEY in the environment. If it doesn't exist, you can directly supply the token parameter. Since we're going to interact with the newly created vector space, it's also essential to provide its ID.
Replace the placeholders with the actual values for the token and vecto_space_id, then run the cell.
from vecto import Vecto
import os

# token =  os.environ['VECTO_API_KEY']
token = ""
vector_space_id = ""

vs = Vecto(token, vector_space_id)
Dataset
In this tutorial, we are using the Kaggle Cats and Dogs Dataset. This dataset has more than 25,000 .jpg images of cats and dogs.
To proceed, you may manually download the dataset and place it in the working directory, or use Kaggle API to download it.
If you would like to use Kaggle, you may follow the following steps:
- Go to your account, Scroll to API section and Click Expire API Token to remove previous tokens if you've created one before.
- Click on Create New API Token - It will download kaggle.json file on your machine.
- Place kaggle.json in the current Jupyter working directory.
! pip install -q kaggle
## run these two cells if you are using google colab
# from google.colab import files
# files.upload()
# ! mkdir ~/.kaggle
# ! cp kaggle.json ~/.kaggle/
# ! chmod 600 ~/.kaggle/kaggle.json
! kaggle datasets download "shaunthesheep/microsoft-catsvsdogs-dataset"
! unzip microsoft-catsvsdogs-dataset.zip -d .
Now your working directory should look like this:
|__vecto_cat_dog_demo
    |__requirements.txt
    |__cat_dog_demo.ipynb
    |__PetImages
        |__Cat
            |__0.jpg
            |__1.jpg
            ...
        |__Dog
            |__0.jpg
            |__1.jpg
            ...
Ingest Dataset
Just like in the previous tutorial, we're going to ingest an image dataset by providing a list of image paths along with their respective attributes. Specifically, we're setting the 'name' and 'path' as the attributes for each image.
import pprint
import pathlib
import os

base_dir = pathlib.Path().absolute()
dataset_path = base_dir.joinpath('PetImages')
pet_images = list(dataset_path.glob('**/*.jpg'))
# pprint(pet_images[:5])

attributes = []
for image_path in pet_images:
    name = os.path.basename(os.path.dirname(image_path))
    attributes.append({"name": name, "path": str(image_path)})

# pprint.pprint(attributes[:5])
attributes = []
for image_path in pet_images:
    name = os.path.basename(image_path)
    attributes.append({"name": name, "path": str(image_path)})

pprint.pprint(attributes[:5])
The batch size determines the number of images ingested in each batch. Here, we set the batch size to 128 to speed up the initial ingest process. However, batch size could be set to any other integer value, even just 1, as this is merely depending on the dataset type and size.
from tqdm.notebook import tqdm

vs.ingest_all_images(pet_images, attributes, batch_size=128)
You will need to wait for the vectorization process to finish before moving to the next section.
Test Ingested Data with Image/Text Vector Search
Let's perform a quick test whether the data has been successfully ingested. As with the previous tutorial, we'll run a few lookup functions.
from ipywidgets import interact_manual, IntSlider, FileUpload
from IPython.display import Image, display
import io

def display_results(results):
    output = []
    for result in results:
        output.append(Image(result.attributes['path']))
        output.append("Name: %s" % result.attributes['name'])
        output.append("Similarity: %s" % result.similarity)

    display(*output)
In the Vecto class, methods are designed with a more granular approach to make sure you get the correct output. So, instead of using a generic lookup_text or lookup_image, you'll use more specific methods such as lookup_text_from_str or lookup_image_from_binary.
def text_query(query, top_k=10):
    f = io.StringIO(query)
    response = vs.lookup_text_from_str(query, top_k)
    display_results(response)


def image_query(query, top_k=10):

    # With ipywidgets 7.7.1, FileUpload produces a nested dict, requiring iteration.
    for file_name, file_info in query.items():
        image = io.BytesIO(file_info['content'])
        response = vs.lookup_image_from_binary(image, top_k)
        display_results(response)
Let's start with some text queries. Using the interactive cell widget you could:
- Type your query text in the available text box.
- Select the number of results with the highest search similarity to view
top_k.
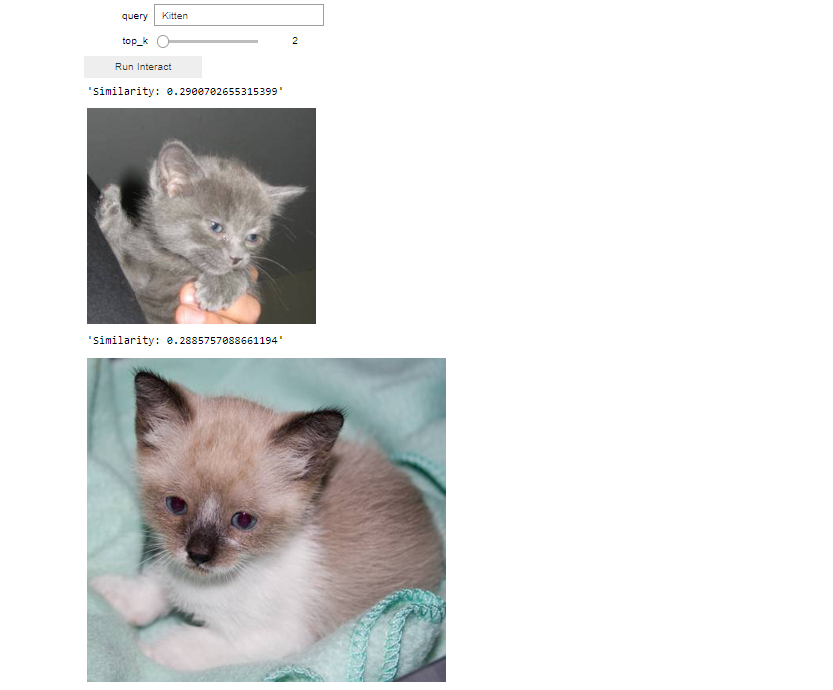
interact_manual(text_query, query="Kitten", top_k=IntSlider(min=1, max=50))
Show Expected Output
Now, let's apply similar principles to image queries. Utilizing the interactive cell widget, you can upload your query image using the 'Upload' button and specify the number of results top_k you wish to view based on the highest search similarity.
For instance, if we upload a picture of a puppy as our image query, we anticipate that the vector search will return images of puppies that are visually similar from the vector space when we click the 'Run Interact' button.
interact_manual(image_query, query=FileUpload(multiple=False), top_k=IntSlider(min=1, max=50))
Up to this point, we have revisited the skills learned from the previous tutorial such as creating a token, ingesting data, and performing vector searches. Now, we're ready to dive into the the new stuff!
Create a Vector Search Analogy
An interesting property of vectors is that analogies can often be solved with vector arithmetic. Taking dog is to puppy as a cat is to kitten as an analogy, we could use the vector difference puppy vector - dog vector as an analogy vector to modify the vector search output for the cat query from returning images of cats as we saw in the Part 2 above to returning images of kittens instead. The arithmetic equation that governs such an analogy can be represented as puppy - dog + cat = kitten.
To construct an analogy, you need three components:
- The start of the analogy, in this example, is Dog
- The end of the analogy, in this example, is Puppy
- The query to apply the analogy on, in this example, is Cat
Here, from the analogy start and end components, we can see the relation is Adult(dog) to Baby(puppy). Therefore we expect to get a kitten when we apply this analogy to the Cat query. Let's try that together:
First, let's add two helper functions to our notebook:
- Handler to apply text-based analogy
text_analogy. - Handler to apply image-based analogy
image_analogy.
def text_analogy(query, start, end, top_k=10):
    query = io.StringIO(query)
    analogy_start_end = {
        "start": io.StringIO(start),
        "end": io.StringIO(end)
    }
    result = vs.compute_text_analogy(query, analogy_start_end, top_k)
    display_results(result)

def image_analogy(query, start, end, top_k=10):

    query = io.BytesIO(query[0]['content'])
    analogy_start_end = {
        "start": io.BytesIO(start[0]['content']),
        "end": io.BytesIO(end[0]['content'])
    }
    result = vs.compute_image_analogy(query, analogy_start_end, top_k)
    display_results(result)
Now all is ready, let's see if our analogy is working.
First, let's start with some text analogy. Using the interactive cell widget, you could:
- Type analogy start, end and query text in the available text boxes.
- Select the number of results with the highest search similarity to view
top_k.
Following our explained example, we will type cat as a query, dog as a start and puppy as an end.
interact_manual(text_analogy, query="cat", start="dog", end="puppy", top_k=IntSlider(min=1, max=50))
Show Expected Output
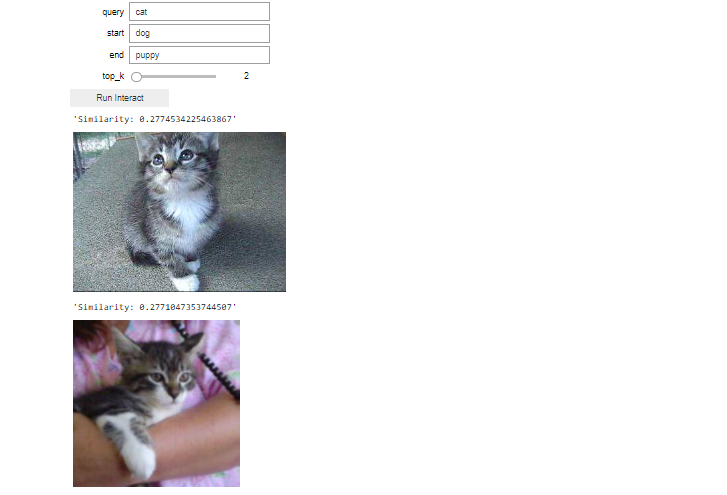
You are expected to see kittens when you query is cat and set the analogy start and end to dog and puppy, respectively. Click the Run Interact button to start the vector search with the analogy.
Now similarly, let's construct the analogy using images.
Using the interactive cell widget, you could:
- upload images for analogy start, end and query image using the upload button for each field.
- Select the number of results with the highest search similarity to view
top_k.
We will upload the cat image as a query, dog image as a start and puppy image as an end, and we expect the vector search to return kitten images from the vector space. Click the Run Interact button to start a vector search with the analogy.
interact_manual(image_analogy, query=FileUpload(multiple=False), start=FileUpload(multiple=False), end=FileUpload(multiple=False), top_k=IntSlider(min=1, max=50))
In this section, we've explored the process and practical applications of constructing analogies in Vecto. The potential applications of analogies are numerous, with one popular use case being the creation of an 'accessory' analogy. This involves designating a variety of start base products and corresponding end accessory products. Therefore, when a user is considering a product purchase, the analogy engine can leverage this relationship to recommend relevant accessories for the chosen product.
There are many other use cases, your creativity is the limit!