Hello Vecto!
Welcome to the first tutorial on using Vecto, the vector database for your application!
This tutorial will guide you through the steps for setting up a Vector Space and creating an application capable of ingesting data and executing image and text lookups. We will be using Jupyter notebook to walk you through the process.
We'll be focusing on the VectorSpace class within our Python SDK. If you're already feeling comfortable and ready for more, you'll find the Vecto class covered in our next tutorial - perfect for our more advanced users.
So, are we ready to dive in?
Setup Jupyter Notebook for Vecto Application
You can skip this section if you already have Jupyter notebook installed, or if you're running this from google colab.
-
Install Python. If you don't have it installed already, download Python 3.8 or later from this link and install it.
-
Create a working directory. Create a new directory on your system where you'll be working on your Vecto application, let's say
hello_vecto_app. -
Create a requirements.txt file. In the
hello_vecto_appdirectory, create arequirements.txtfile and include the following libraries:ftfytqdmrequestspillowipywidgets==7.7.1notebookpandasvecto-sdk -
Install the required libraries. Open your system's Terminal or Command Prompt, navigate to the
simple_vecto_appdirectory, and run the following command to install the libraries listed in therequirements.txt:pip install -r requirements.txt -
Verify the installation. To check if the libraries have been installed correctly, run the following command in the Terminal or Command Prompt:
jupyter notebook
A new browser window should open with Jupyter Notebook running. If this happens, then you have successfully set up Jupyter Notebook for your Vecto application.
Create a Vecto Token
To gain access to Vecto resources, an authentication token is required.
-
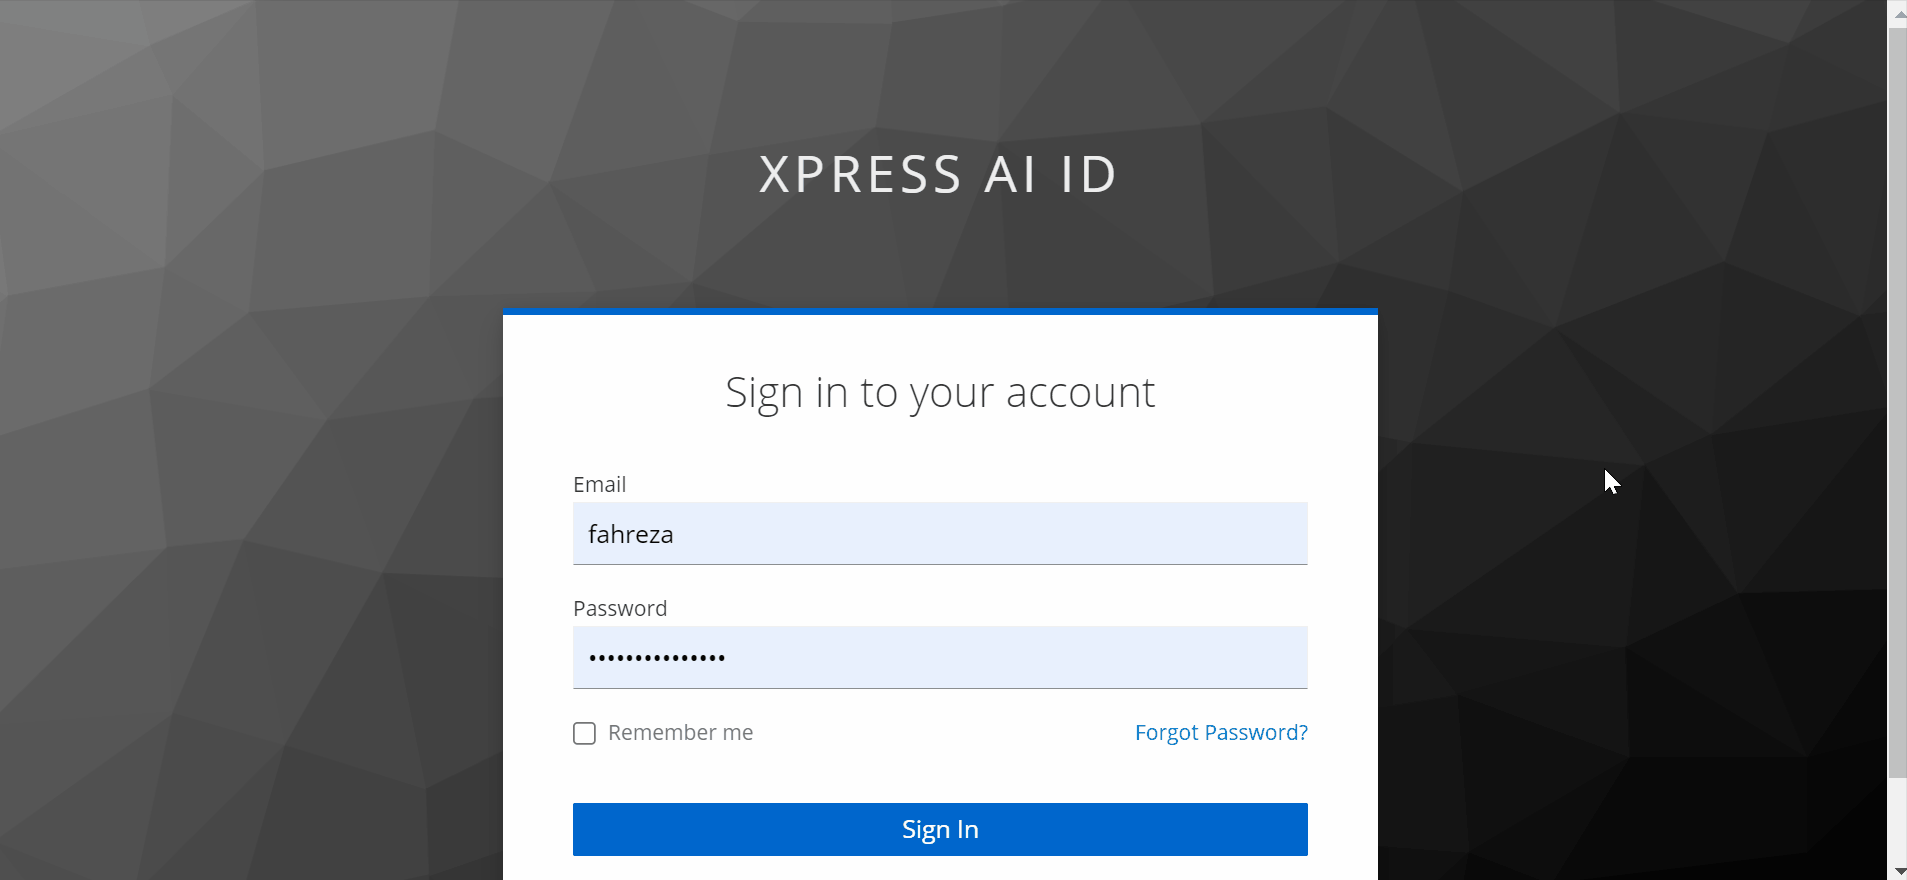
Navigate to the Vecto login page at Vecto Login. Input your Username and Password into the appropriate fields, and then click the Sign In button.
-
Click on your username and select the Tokens tab located in the sidebar.
-
Vecto provides multiple levels of authentication access, but for the purpose of this tutorial, we'll use a token with
ACCOUNT_MANAGEMENTprivileges. Set the token name to your preference, for instance,hello_world_token, and proceed to create the token. -
This token serves to authenticate access to Vecto's servers. Save this token since it will only be displayed once! We'll be using it in the subsequent step.
It's important to keep your token safe. You should never share this token with anyone else. A common practice is to set the token in an .env file or export it as a variable.
Initializing Vecto
Let's kick things off by importing the vecto package and setting our vecto_token with the token you obtained in the previous step. In Jupyter Notebooks (e.g., Google Colab), you can use the %env magic command to set your Vecto API key:
%env VECTO_API_KEY=YOUR_NEW_KEY
Or if you're in Unix-based Systems, use the export command in your terminal:
export VECTO_API_KEY='YOUR_NEW_KEY'
Alternatively, you can set the vecto.api_key variable directly as shown below. Next create VectorSpace by specifying a vector_space name. If the specified vector space doesn't already exist, we'll use the create method to establish a new vector space with a specified model name. Since we'll be working with both text and images in this tutorial, the CLIP model is a good choice.
import vecto

vecto.api_key='YOUR_NEW_KEY'
vs = vecto.VectorSpace("hello-vecto")

if not vs.exists():
    vs.create(model='CLIP')
And there you have it! With just a few lines of code, you've unlocked the core capabilities of Vecto. Now, let's dive deeper and explore what we can achieve with it.
Add and Ingest Data into Vector Space
The next step is ingesting data into our vector database. Ingesting data involves introducing your chosen dataset into the Vecto platform. During this process, Vecto doesn't store your raw data; it transforms it into embeddings, which are vector representations of your data. These embeddings are compact, yet they maintain the essential information from your original data, making them perfect for indexing and fast, efficient searches.
This transformation into embeddings is where the real power of Vecto lies. By representing your data as embeddings, it allows for advanced comparison methods and facilitates a more nuanced understanding of the relationships in your data.
Dataset
In this tutorial, we will use the LFW - People (Face Recognition) dataset from Kaggle which contains 13,000 .jpg images of different people faces. You may manually download the dataset and place it in the working directory, or use Kaggle API to download it.
If you would like to use Kaggle to download the dataset, you may follow the following steps:
-
Go to your Kaggle account, Scroll to API section and Click Expire API Token to remove previous tokens if you've created one before.
-
Click on Create New API Token - It will download kaggle.json file on your machine.
-
Place kaggle.json in the current Jupyter working directory.
pip install -q kaggle## run these if you are using google colabfrom google.colab import filesfiles.upload()! mkdir ~/.kaggle! cp kaggle.json ~/.kaggle/! chmod 600 ~/.kaggle/kaggle.json! kaggle datasets download "atulanandjha/lfwpeople"! unzip lfwpeople.zip -d .! tar -xf lfw-funneled.tgz -C .
Now your working directory should look like this:
|__simple_vecto_app
    |__requirements.txt
    |__vecto_application.ipynb
    |__lfw_funneled
        |__name1
            |__name1_0001
            |__name1_0002
            ...
        |__name2
            |__name2_0001
            |__name2_0002
            ...
Ingest the Dataset
As a rule of the thumb, when ingesting an object into Vecto, two main components are necessary - the raw data itself and its corresponding attributes.
-
datacan be eitherIMAGEorTEXT, depending on your chosen model's capability. For instance, theCLIPmodel can handle bothIMAGEandTEXTtypes, providing versatility, while theSBERTmodel is specialized forTEXT. It's best to choose the right model for your specific use case. -
attributesserve as identifiers for your data. This could be anything like the filename or a description. You can even extend it to include additional identifying details. However, remember that theseattributesare not ingested. They are not vectorized and do not affect thedataingestion process. Instead, they act merely as identifiers that Vecto will return upon searching the data.
The VectorSpace class has an ingest_all_images function which will ingest a list of images and attributes. Let's use it!
Let's find our base directory path and join it to our dataset folder; we use list(dataset_path.glob('**/*.jpg')) to collect all the images path in the dataset into a Python list.
import pathlib
import pprint
import os

base_dir = pathlib.Path().absolute()
dataset_path = base_dir.joinpath('lfw_funneled')
dataset_images = list(dataset_path.glob('**/*.jpg'))

pprint.pprint(dataset_images[:5]) # print path to the first 5 image paths.
Let's then define the attribute of the ingested data. For this tutorial, we're going to use the name and filepath as the attribute.
attributes = []
for image_path in dataset_images:
    name = os.path.basename(os.path.dirname(image_path))
    attributes.append({"name": name, "path": str(image_path)})

pprint.pprint(attributes[:5])
The batch size determines the number of images ingested in each batch. Here, we set the batch size to 64 to speed up the initial ingest process. The batch size could be set to any other integer value as low as 1, as it depends on the dataset type and size.
from tqdm.notebook import tqdm

response = vs.ingest_all_images(dataset_images, attributes, batch_size=64)
You will need to wait for the vectorization process to finish before moving on.
Vector Search in Vector Space
Once the data ingestion is complete, we can run various search queries in the unique hello-vecto Vector Space, using images from inside or outside the dataset. We can also find similarities using TEXT queries, even though the Vector Space only contains images, as we are using the CLIP model.
To search within the Vector Space, we need to ingest the query into a vector and search for similar data to the query vector against the whole Vector Space, then display the images with the highest similarity. For that, we will use a few helper functions to handle the mentioned processes. Let's add these three functions: display_results, text_query, and image_query to our notebook.
from ipywidgets import interact_manual, IntSlider, FileUpload
from IPython.display import Image, display
import io

def display_results(results):
    output = []
    for result in results:
        output.append(Image(result.attributes['path']))
        output.append("Name: %s" % result.attributes['name'])
        output.append("Similarity: %s" % result.similarity)

    display(*output)

def text_query(query, top_k=10):
    f = io.StringIO(query)
    response = vs.lookup_text(query, top_k)
    display_results(response)


def image_query(query, top_k=10):

    # With ipywidgets 7.7.1, FileUpload produces a nested dict, requiring iteration.
    for file_name, file_info in query.items():
        image = io.BytesIO(file_info['content'])
        response = vs.lookup_image(image, top_k)
        display_results(response)
Search using in-dataset query
Let's pick an image from the dataset as our search query. Our goal is to find similar items "people" for that image within our hello-vecto Vector Space. Here, we will pick this image Aaron_Eckhart_0001.jpg.

interact_manual(image_query, query=FileUpload(multiple=False), top_k=IntSlider(min=1, max=50))
Show Expected Output
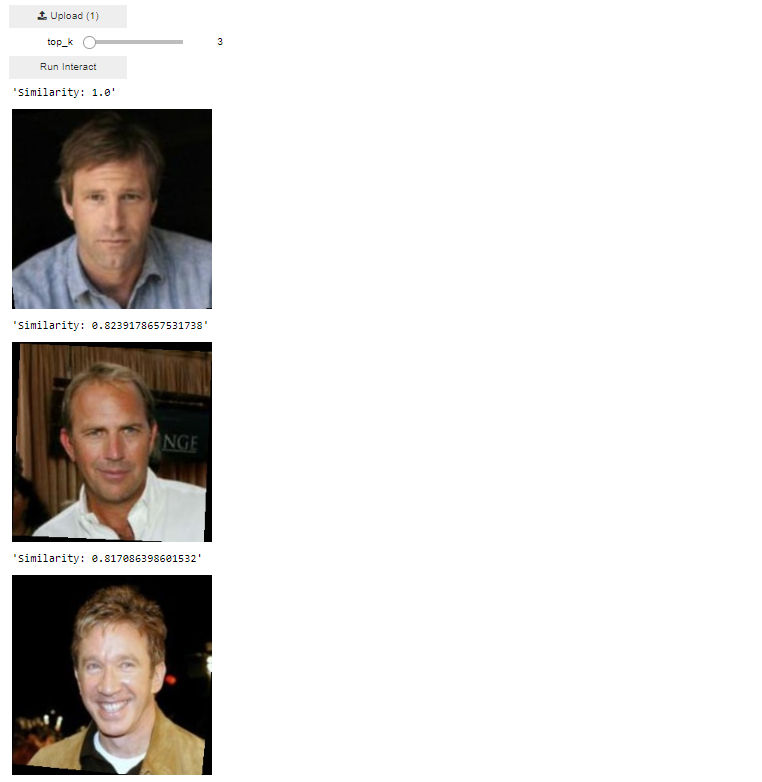
After we add and run the above line of code in our notebook, you will see the following widget, upload the query image available at lfw_funneled/Aaron_Eckhart/Aaron_Eckhart_0001.jpg, adjust the top_k bar to limit the number of returning top similar items and click the Run Interact button to start the vector search:
The returned images of the query vector search show the image with the highest similarity is the image itself Similarity=1.0, and that is because our query was an image available within the Vector Space.
Search using out-of-dataset query
To check if our vector space is robust to external data, we will upload an image from outside the dataset as our query image. Similarly, you must follow the same steps in search using in-dataset query. Here, we download and use this out-of-dataset image we downloaded from Pexels website.

After we add and run the above line of code to our vecto_application notebook, the widget appears, upload the out-of-dataset image as a search query, choose a top_k value and click on the Run Interact button to start the vector search.
interact_manual(image_query, query=FileUpload(multiple=False), top_k=IntSlider(min=1, max=50))
Show Expected Output
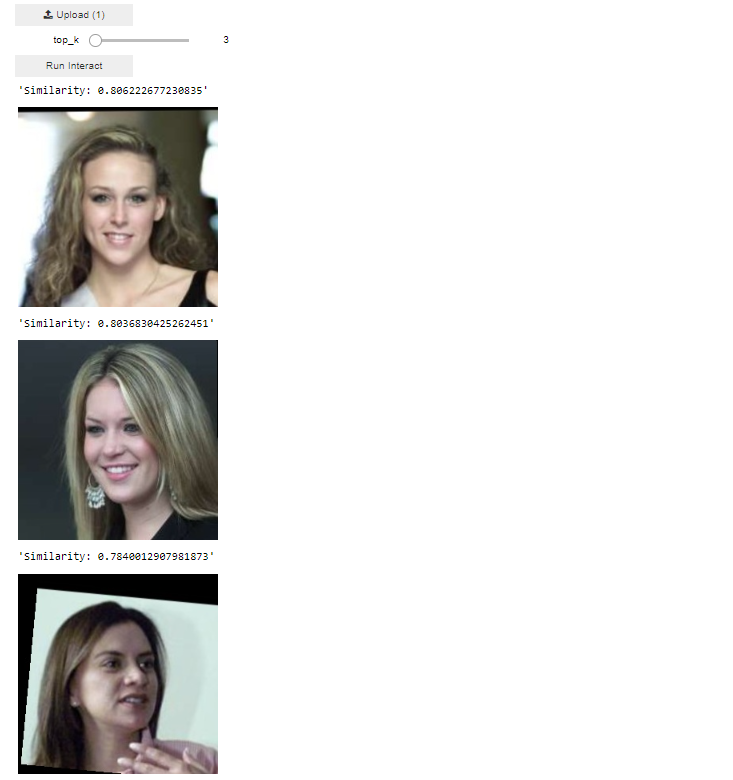
The returned images of the query vector search are for different women with relatively similar features to our out-of-dataset image.
Search using text query
Finding similar data in the hello_vecto Vector Space based on a text query is achievable too. All that needs to be done is to pass the text to the widget then Vecto will handle the text ingest and query vector search.
For text query, after we add and run the above line of code to our vecto_application notebook, you are expected to see the following widget instead, type Woman as a text query into the text-box, adjust the top_k bar to limit the number of the returning similar items and click the Run Interact button to start the vector search.
interact_manual(text_query, query="Women", top_k=IntSlider(min=1, max=50))
The returned images of the text query vector search should be different women. Now try experimenting with other text queries, like "red haired people" or "man in a hat" and analyze the vector search output!
Conclusion
If you've reached the end of this tutorial, congratulations! You have learned how to:
- Set up an application and generated a Vecto token for authentication
- Initialize the Vecto environment and how to create a Vector Space using the CLIP model
- Ingest data - in this notebook, the LFW - People (Face Recognition) dataset into our Vector Space
- Perform vector searches using both text and image queries from within the dataset and external sources
While this tutorial offered an introduction to the basics of Vecto, we have only interacted with the VectorSpace API, which has limited functionalities.
In the upcoming tutorial, we'll delve deeper into the core Vecto API, which provides additional management functions and offers more flexibility and control over your vector databases.